Account Opening Methods
Choose the method that works best for you
Offline Mode
Visit our branch network and complete the account opening process with the assistance of our representatives
Learn MoreOnline Mode
Complete the entire account opening process digitally from the comfort of your home
Learn MoreOffline Mode Account Opening Process
Complete your account opening through our branch network
Document Collection
Account opening application form and other required documents received from branches including direct form of client.
Document Verification
Started the scrutiny of KYC form and other required documents.
Compliance Check
Inform to branches or client if any compliance issues in KYC form and documents.
KYC Processing
Application form along with other documents is fully complied as per requirement. Then KYC form forwarded to CKYC & KRA process.
Online Account Opening Process
DP + Trading / Only DP / Only Trading Account
Select Account Type
If you wish to open DP + Trading / Only Trading account select option (DP & Trading). If you wish to open only DP account select option (Only DP).
Sign Up Process:
Sign up by filling your details (PAN/Mobile/Email & DOB)
IMPORTANT NOTE:
AADHAAR & MOBILE NUMBER SHOULD BE LINKED.

Mobile Verification
Verify your mobile number by entering OTP received via SMS.
This verification ensures that the mobile number provided belongs to you and will be used for future communications.

Email Verification
Verify your email ID by entering OTP received via email.
This verification ensures that the email address provided belongs to you and will be used for future communications and important account updates.

Step 4: Address Verification - DigiLocker Method
Mobile Authentication
First you need to authenticate your mobile number by entering the OTP received on your mobile number.

Authenticate Aadhaar
After that click on "Authenticate Aadhaar" button to proceed with the verification process.

Enter Aadhaar Number
Then DigiLocker window will be opened where you need to enter the Aadhaar number.

Allow Access
After that click on "Allow" to grant DigiLocker access to your Aadhaar information.

Enter OTP
Enter the OTP which will be received on mobile number which is linked to Aadhaar card.

Data Fetched
Data will be fetched from DigiLocker automatically and populated in your application form.

Alternative: Manual Entry Method
If DigiLocker doesn't work, use this manual process
Manual Address Entry
In case if DigiLocker doesn't work, proceed through Manual Entry option:
- Select gender code
- Enter address manually
- Enter proof number
- Upload proof copy

Step 4: Bank Details
Choose Bank
Choose your bank name from the dropdown list.

Enter IFSC & Account Number
Search by entering the IFSC code (use second dropdown list) & after that enter account number.
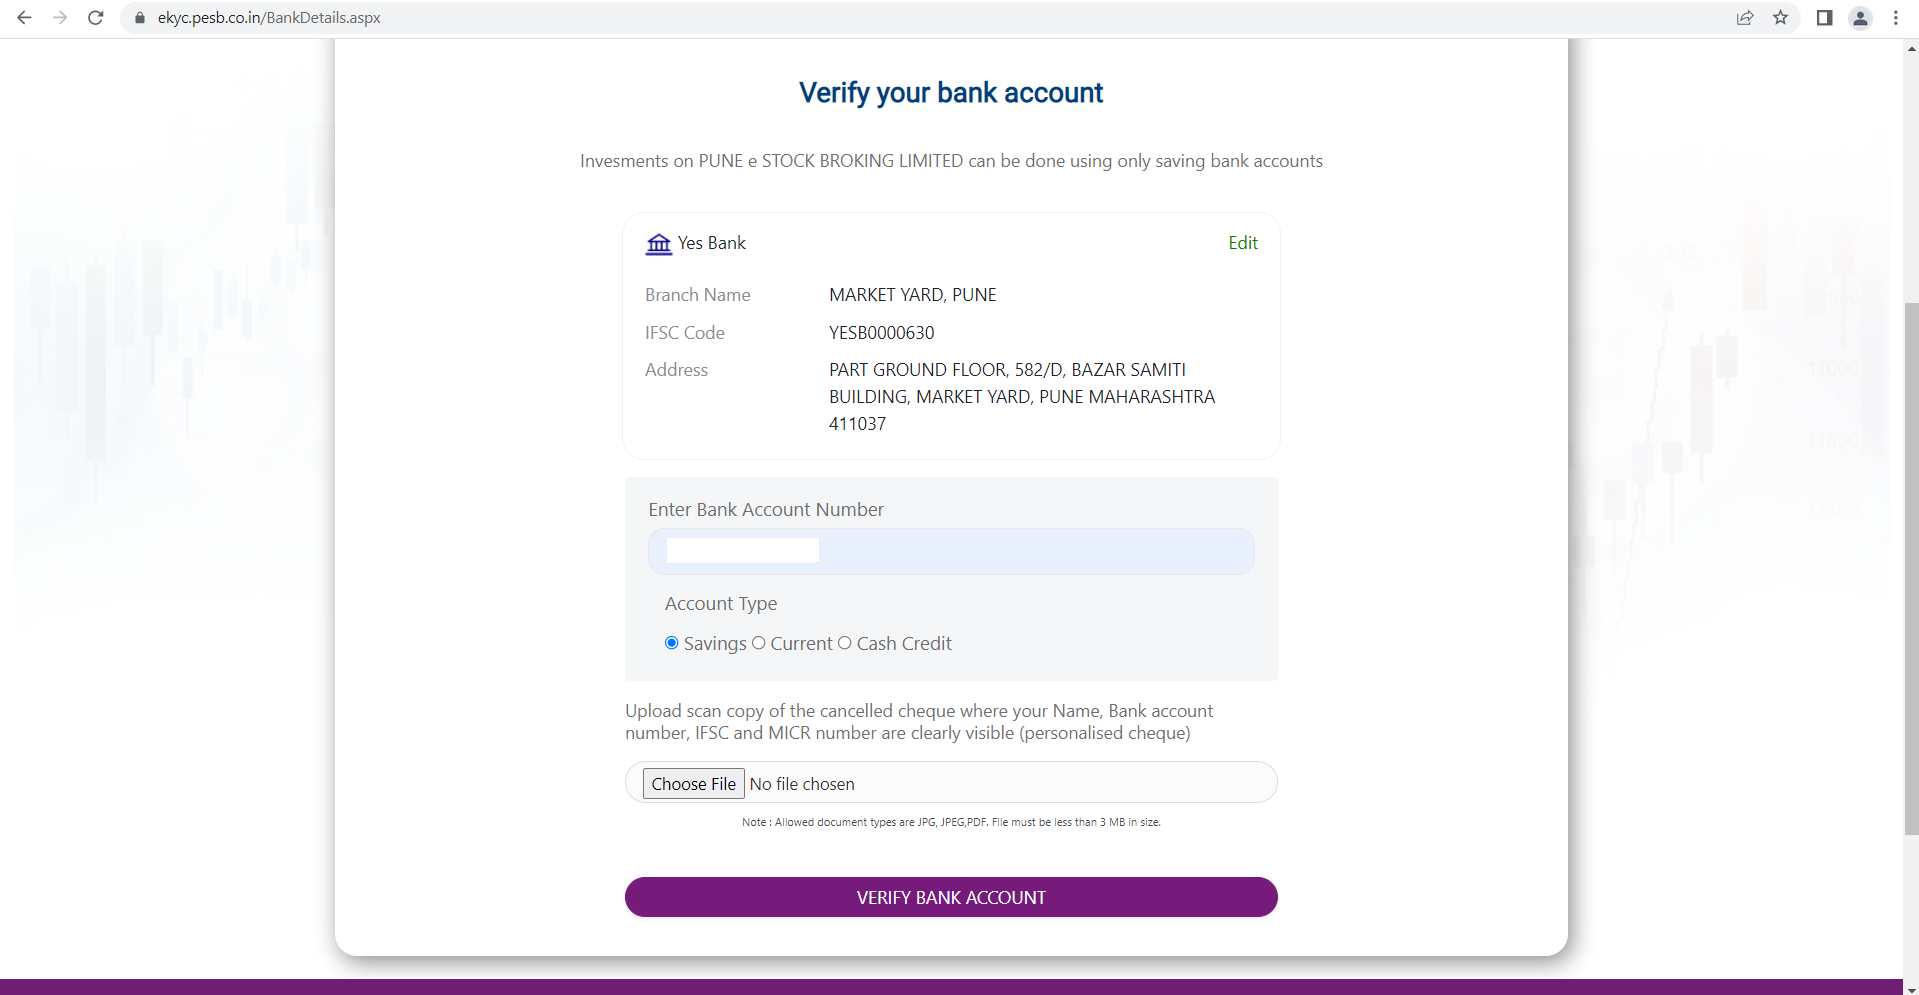
Upload Bank Proof
Choose the file (bank proof) & crop it properly if needed, rotate it & then upload it.
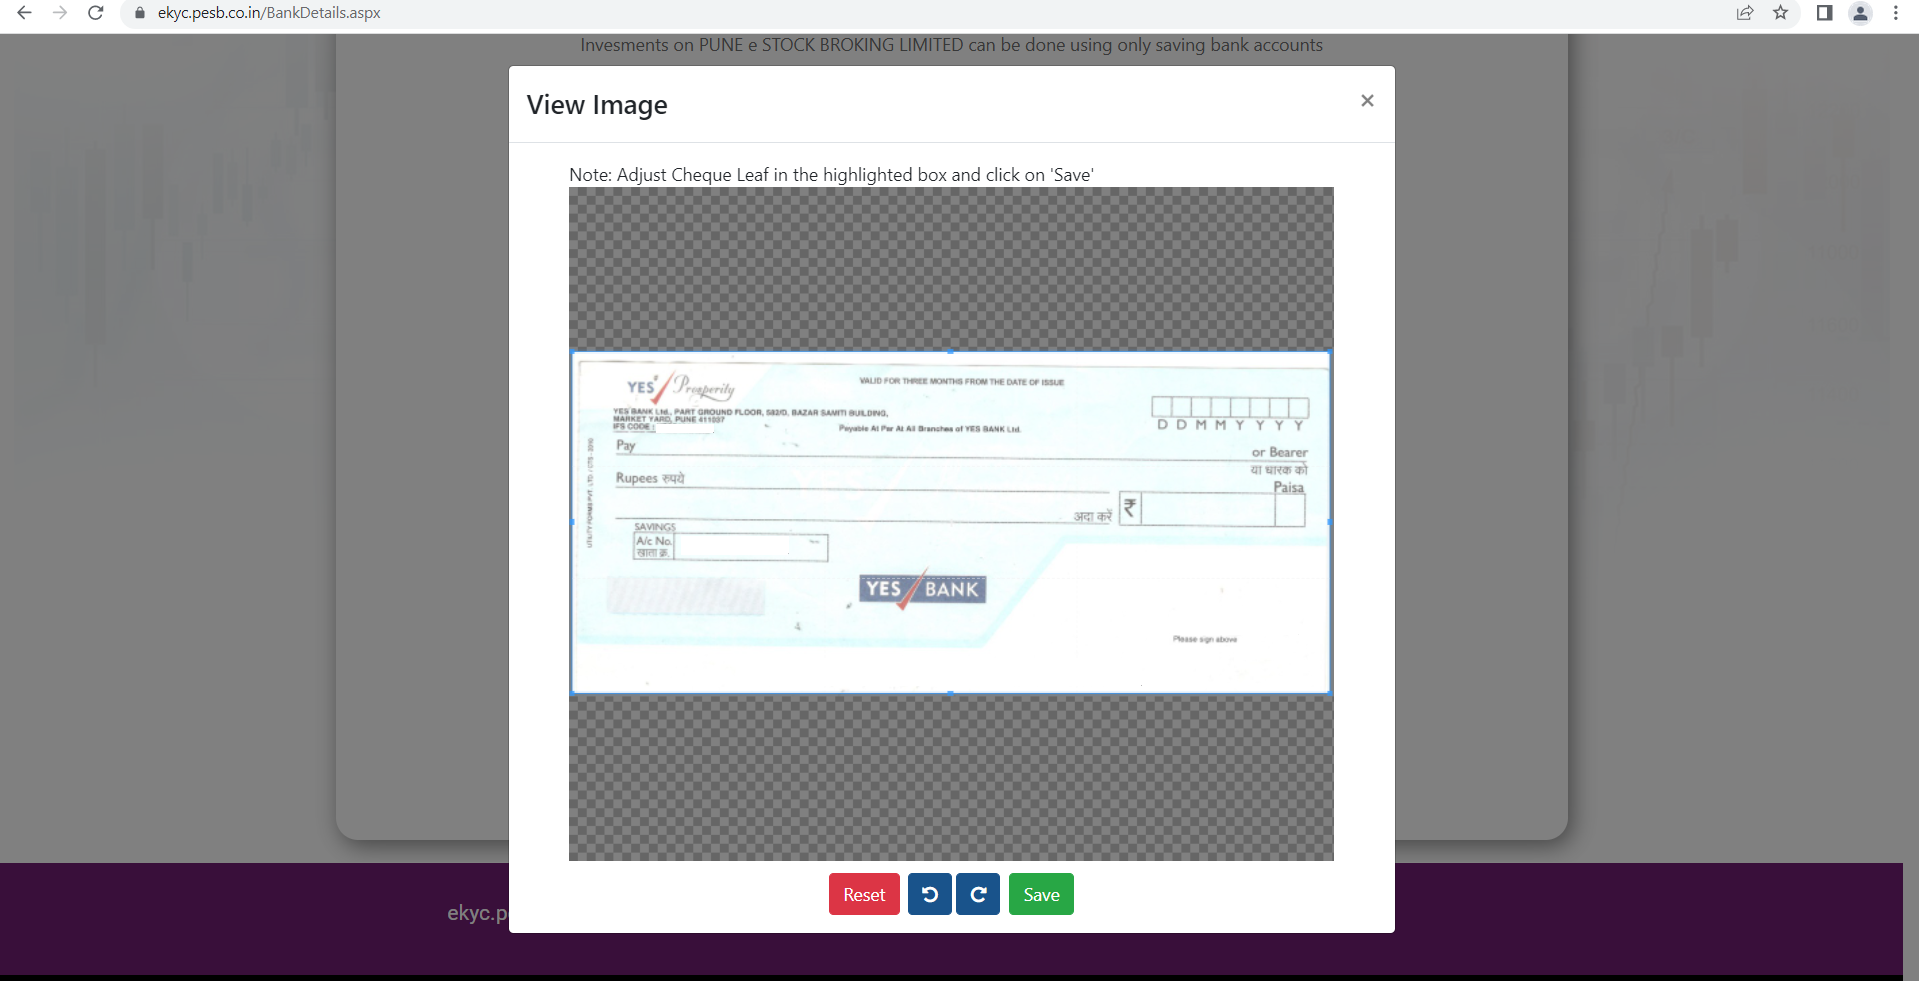
Confirm & Proceed
Confirm account number, then save & proceed to the next step.

Step 5: Profile Information
Upload PAN & Signature
Upload your PAN copy (get it verified), upload signature on plain white paper & then fill your basic information.

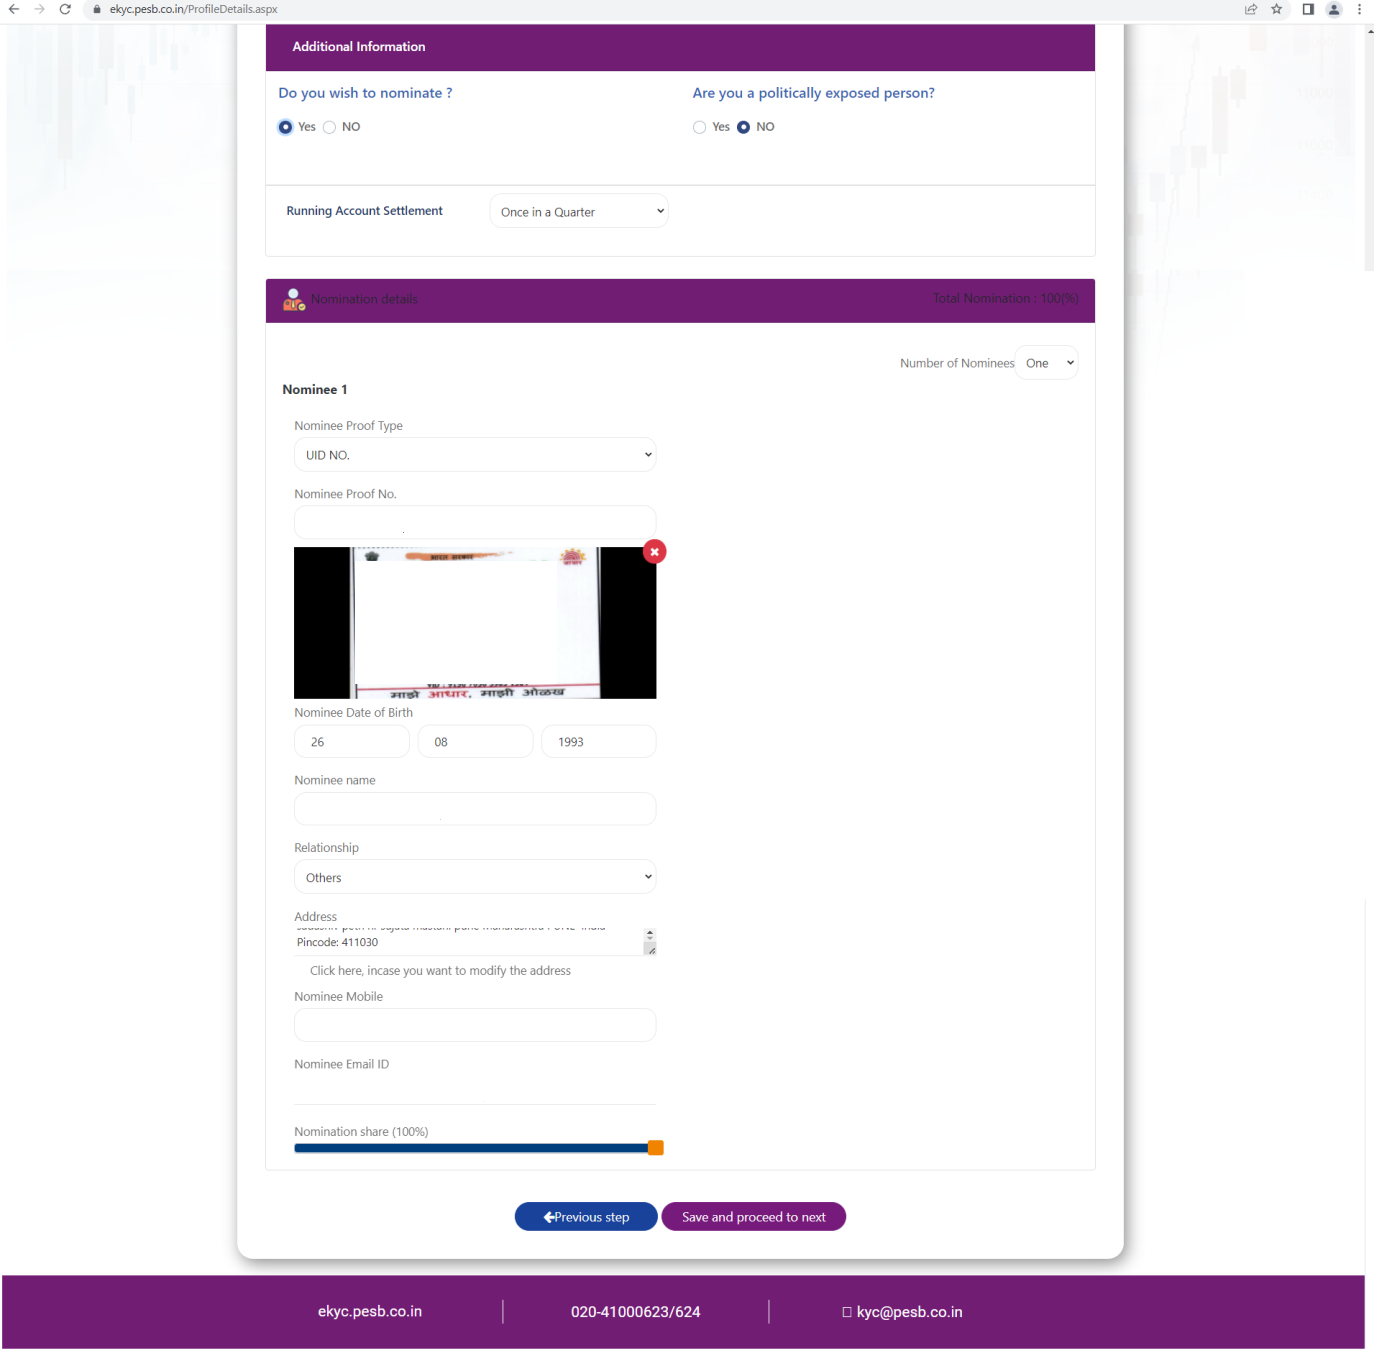
Additional Information
In additional information section, add nominee details & identity proof (if DP+Trading / Only DP account).
Step 6: Exchange Selection
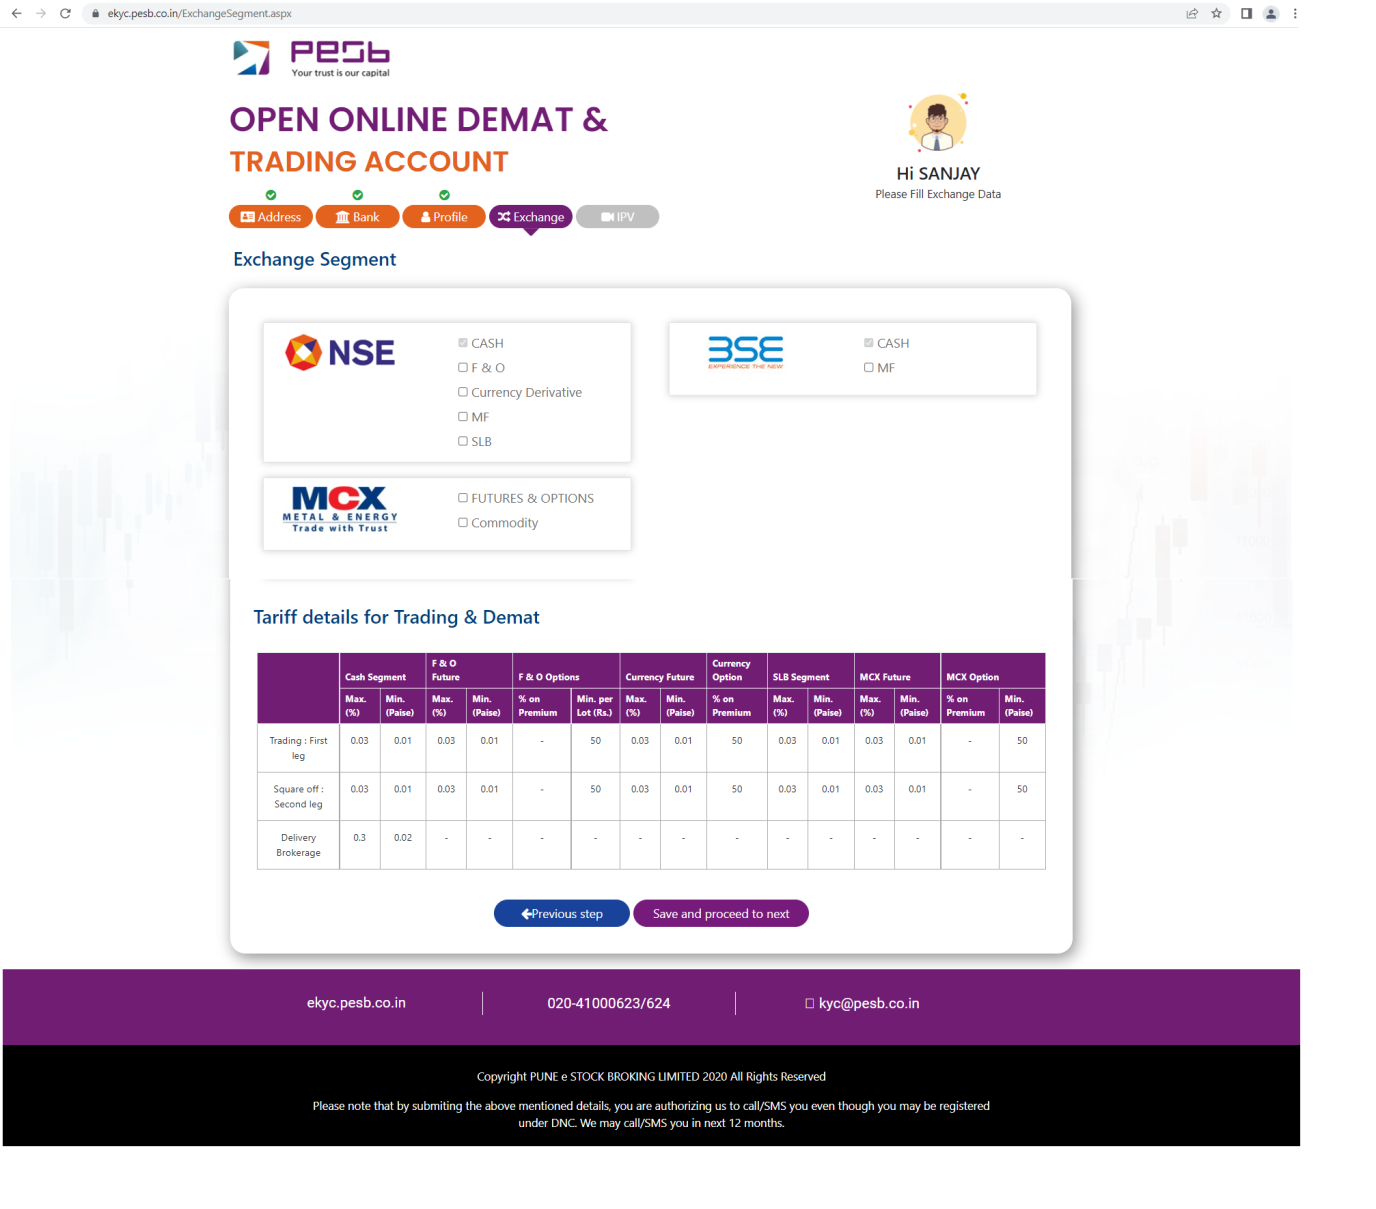
Exchange Selection
Select the segments in which you want to trade (NSE & BSE is selected by default).
If you select F&O/Currency/Commodity/SLB, you need to upload valid proof i.e., latest 6 month bank statement/ITR.
Step 7: In-Person Verification (IPV)
IPV Requirements
If you have completed your address stage through DigiLocker, you just need to click your photo.
If you have completed your address stage through Manual Entry, you need to shoot video by reading OTP (system generated) & then you need to click your photo.
IMPORTANT NOTE:
For IPV stage you must turn ON your device location & allow microphone & camera access. Chrome version should be updated.
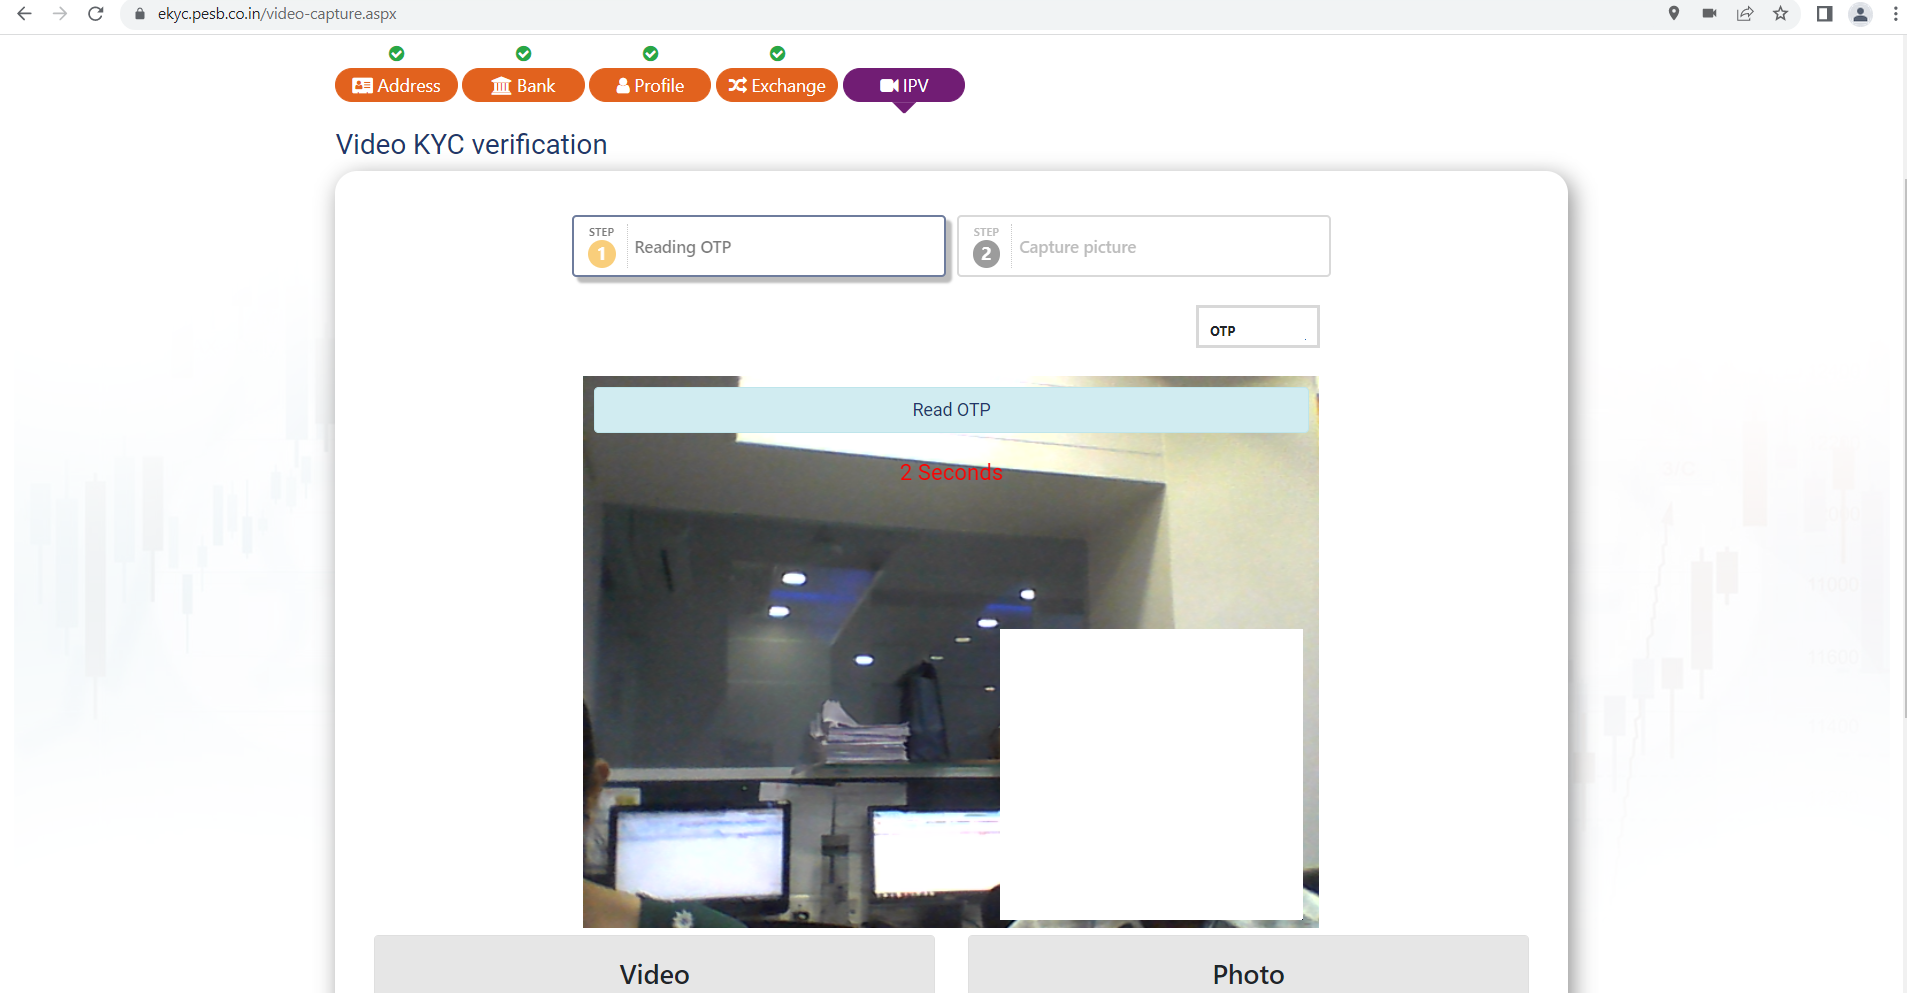
Take Photo
Click your photo as required for the verification process. Make sure you are in good lighting and your face is clearly visible.
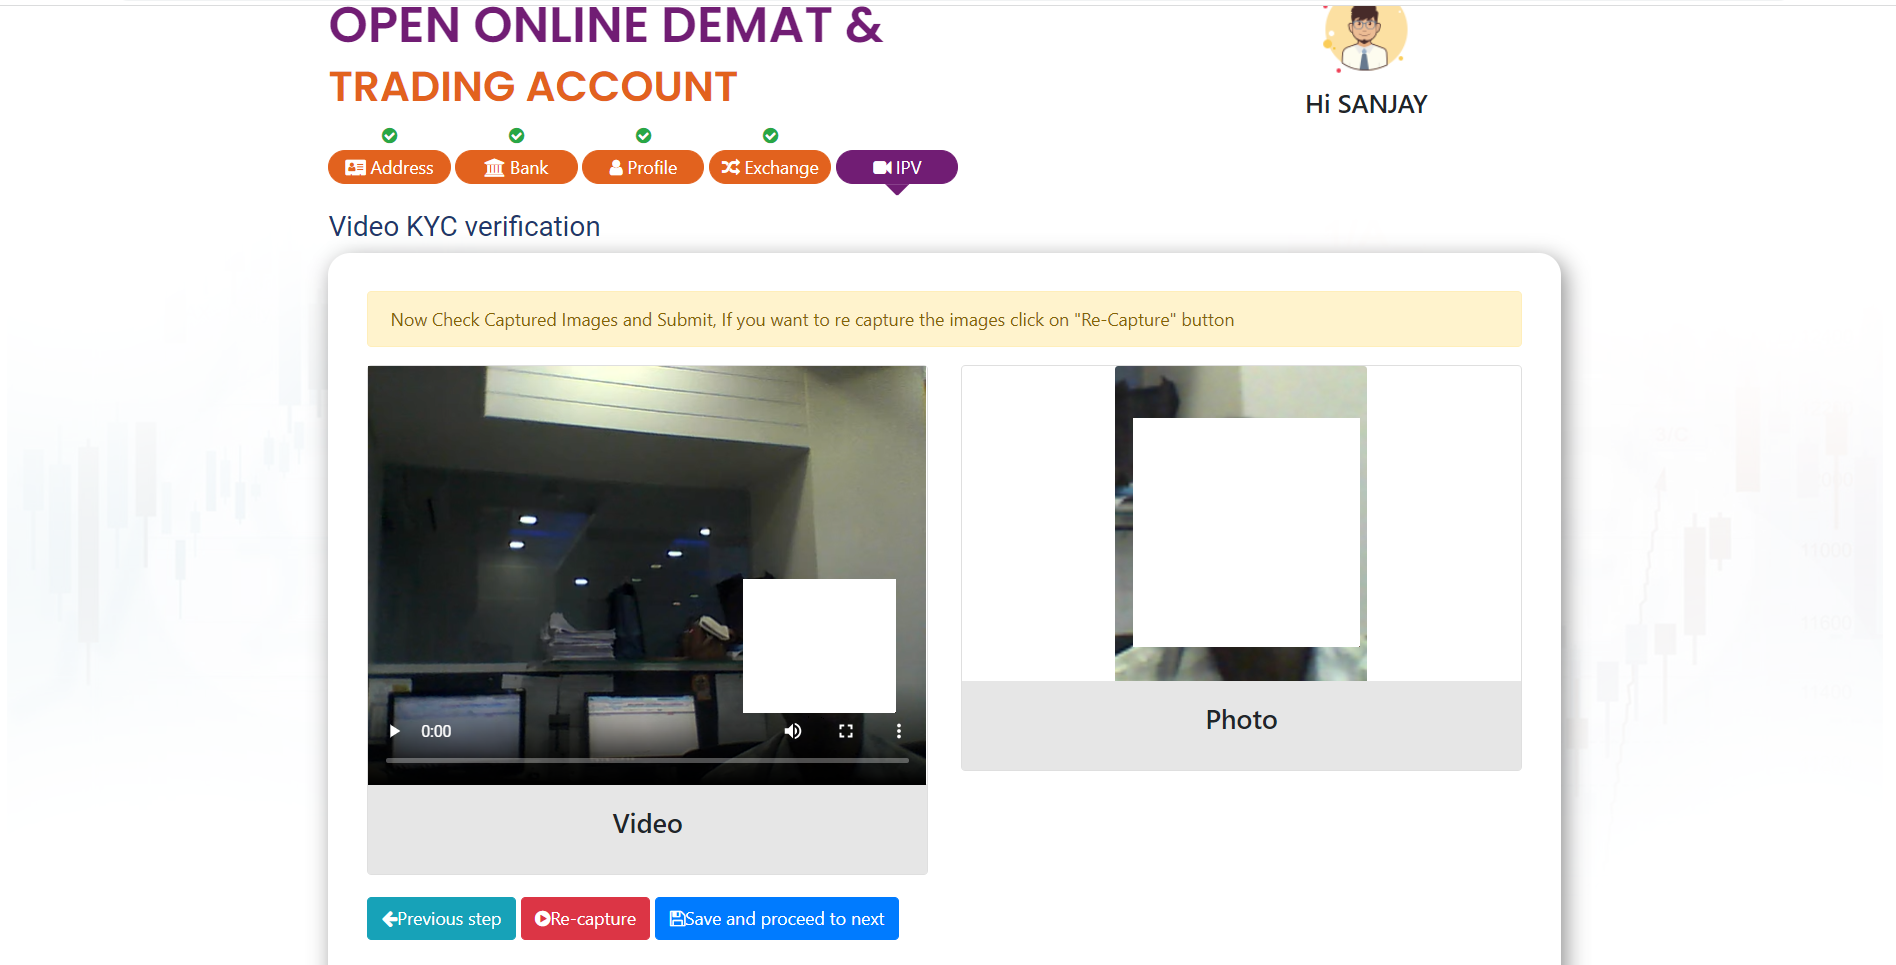
IPV Completion
After completing the IPV process, you will see the confirmation screen. Your verification is now complete.
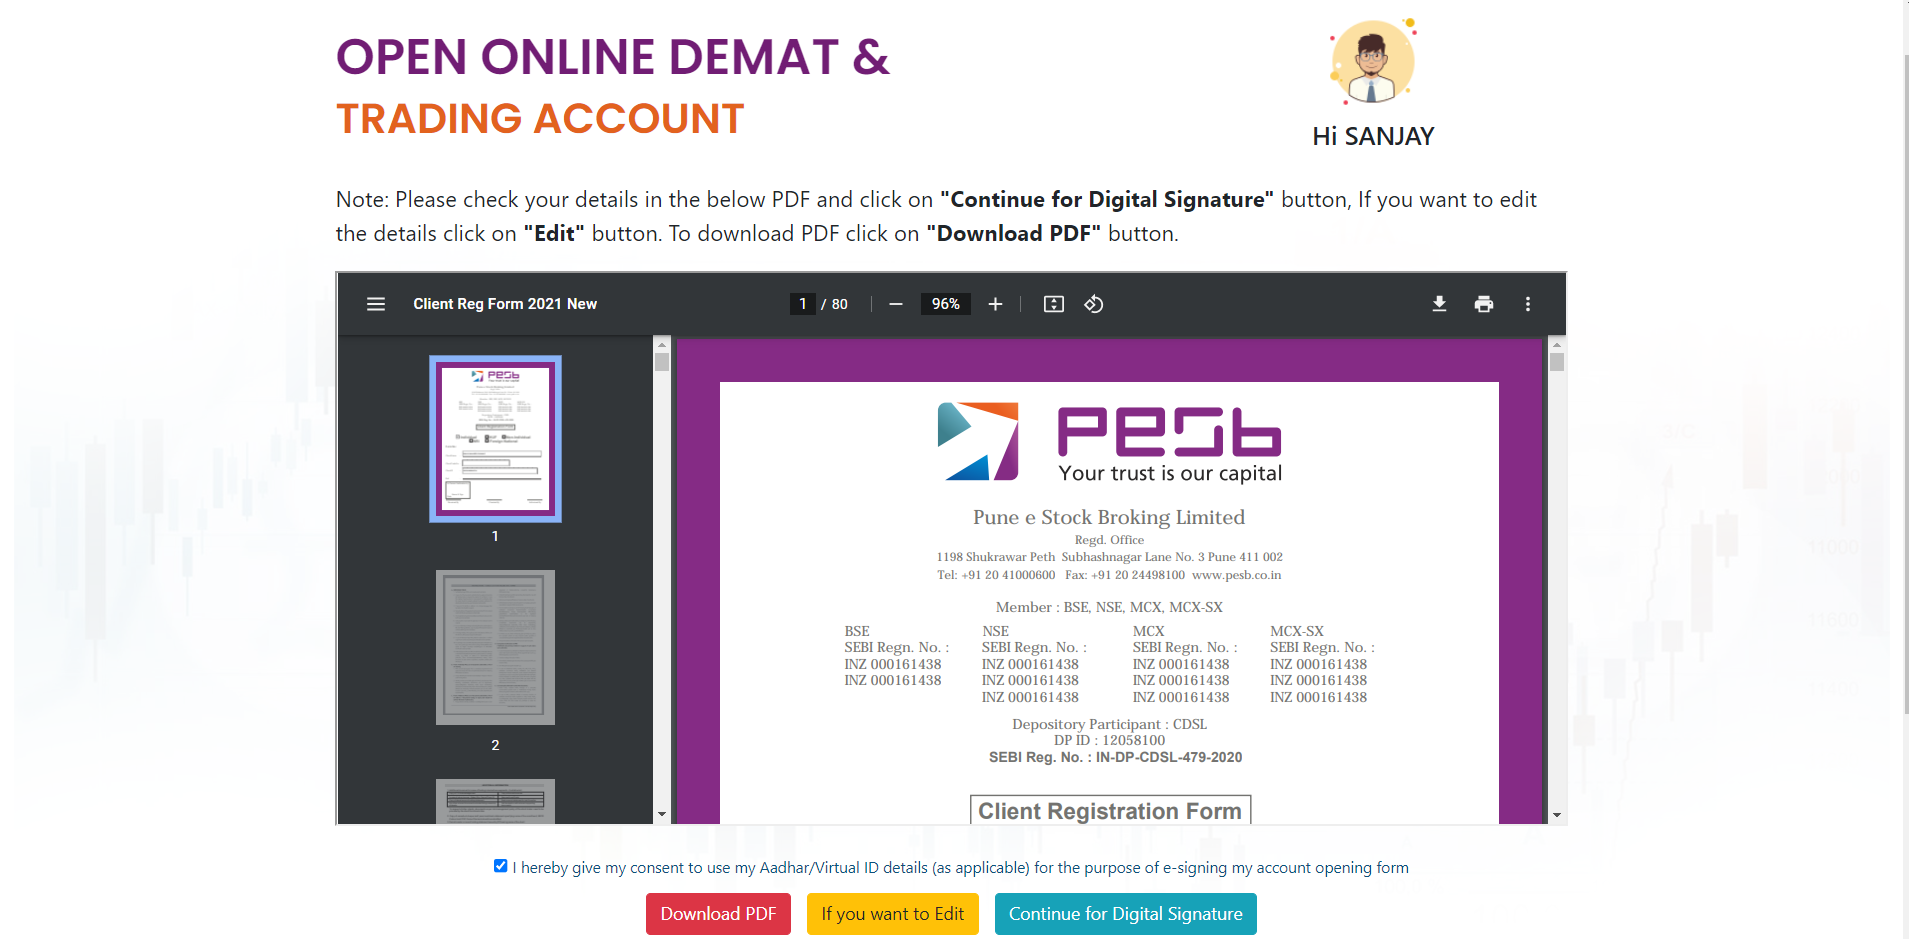
Step 8: Final Steps
Final Steps
After saving the IPV, you will see the PDF on window. Below that there will be 3 options:
Download PDF
Save your application form for your records
Edit Application
Make changes to your application if needed
Digital Signature
Complete the process with digital signature
IMPORTANT NOTE:
Do digital signature ONLY when your application gets completely verified from verifier.
